SDCStudio Overview — From CSV to Published Schema
Reading time: ~15 minutes | Level: Beginner Prerequisites: Tutorial 1: What is SDC?
What You'll Learn
- What SDCStudio does and how it fits into the SDC ecosystem
- How to navigate the dashboard and main interface
- The complete end-to-end workflow from file upload to generated outputs
- Key concepts: Projects, Models, Clusters, Components
- Where to go next for deeper learning
What SDCStudio Does
SDCStudio is an AI-powered web application that helps you create SDC4-compliant data models. You give it a data file (like a CSV), and it:
- Parses the file structure — columns, types, patterns
- Analyzes the data using AI agents — semantic meaning, validation rules, relationships
- Generates a complete data model — SDC4 components with appropriate types and constraints
- Publishes the model as an immutable, versioned schema
- Produces output files — XSD, XML, JSON, JSON-LD, HTML, RDF, SHACL, GQL
You review and refine the AI's work at each step. The goal is to go from raw data to a published, multi-format schema with embedded governance and semantics.
Dashboard and Navigation
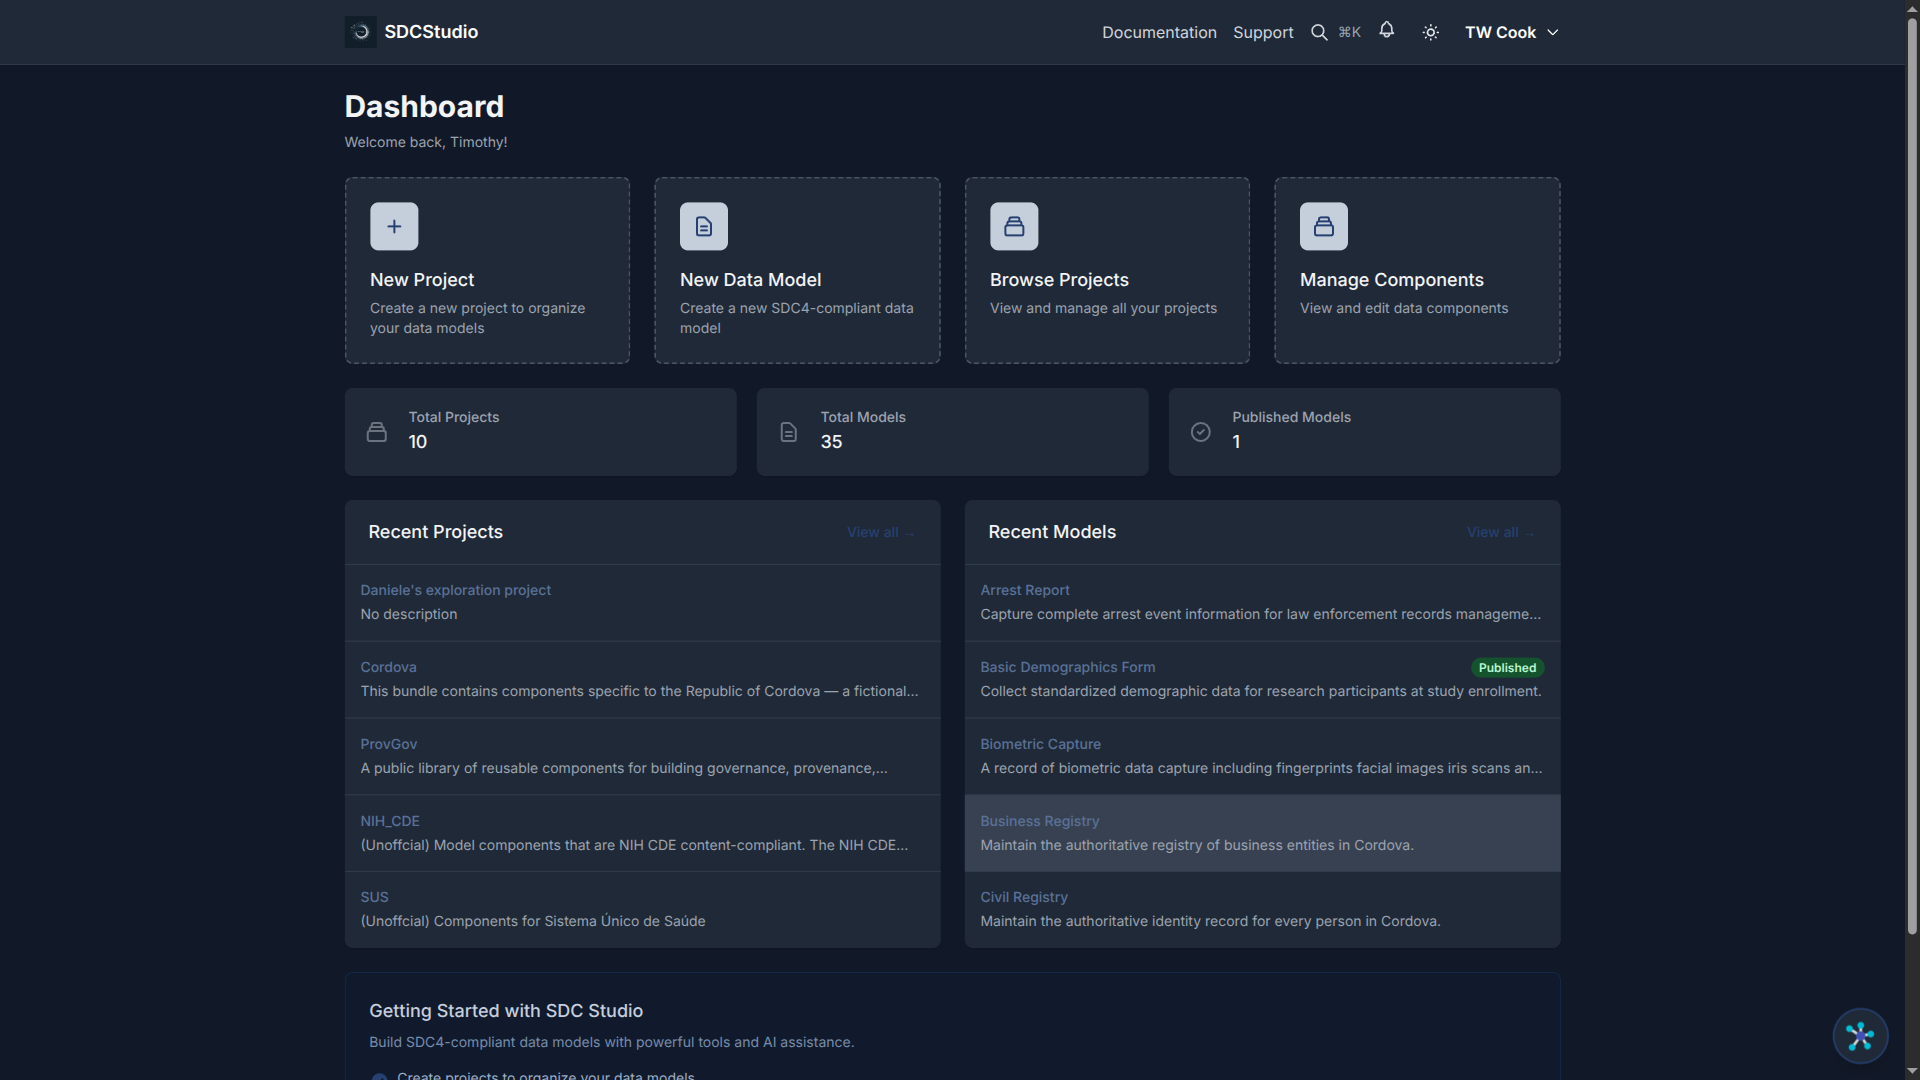
When you sign in, you see the React SPA interface with these main areas:

Main Navigation: - Dashboard — Overview of your projects and recent activity - Projects — Create and manage project containers - Data Sources — View uploaded files and their processing status - Data Models — Browse and edit your data models - Components — Manage individual data components - Settings — Configure profile, upload ontologies, set preferences
Key Interface Features: - Real-time updates — Status badges refresh automatically as AI processes your data - Color-coded status — Blue for in-progress, yellow for processing, green for complete, red for errors - Contextual actions — Buttons appear based on what you are viewing and its current state
The End-to-End Workflow
Here is the complete flow from a CSV file to published outputs. Each step links to a dedicated tutorial for details.
Step 1: Configure Settings (Do This First)
Before uploading any data, configure your Settings:
- Click the Settings icon in the top navigation
- Go to the Ontologies tab
- Upload your organization's custom ontologies in Turtle (.ttl) format
Standard ontologies (FHIR, SNOMED, NIEM, schema.org) are already built into SDCStudio. You only need to upload your own domain-specific vocabularies. Uploading ontologies before processing data significantly improves AI suggestions.
Deeper dive: Tutorial 8: Semantic Linking
Step 2: Create a Project
Projects organize related data models, components, and data sources.
- Navigate to Projects
- Click Create New Project
- Enter a name (e.g., "Customer Analytics"), description, and domain
- Click Create
Deeper dive: Tutorial 10: Working with Models and Projects
Step 3: Upload a Data File
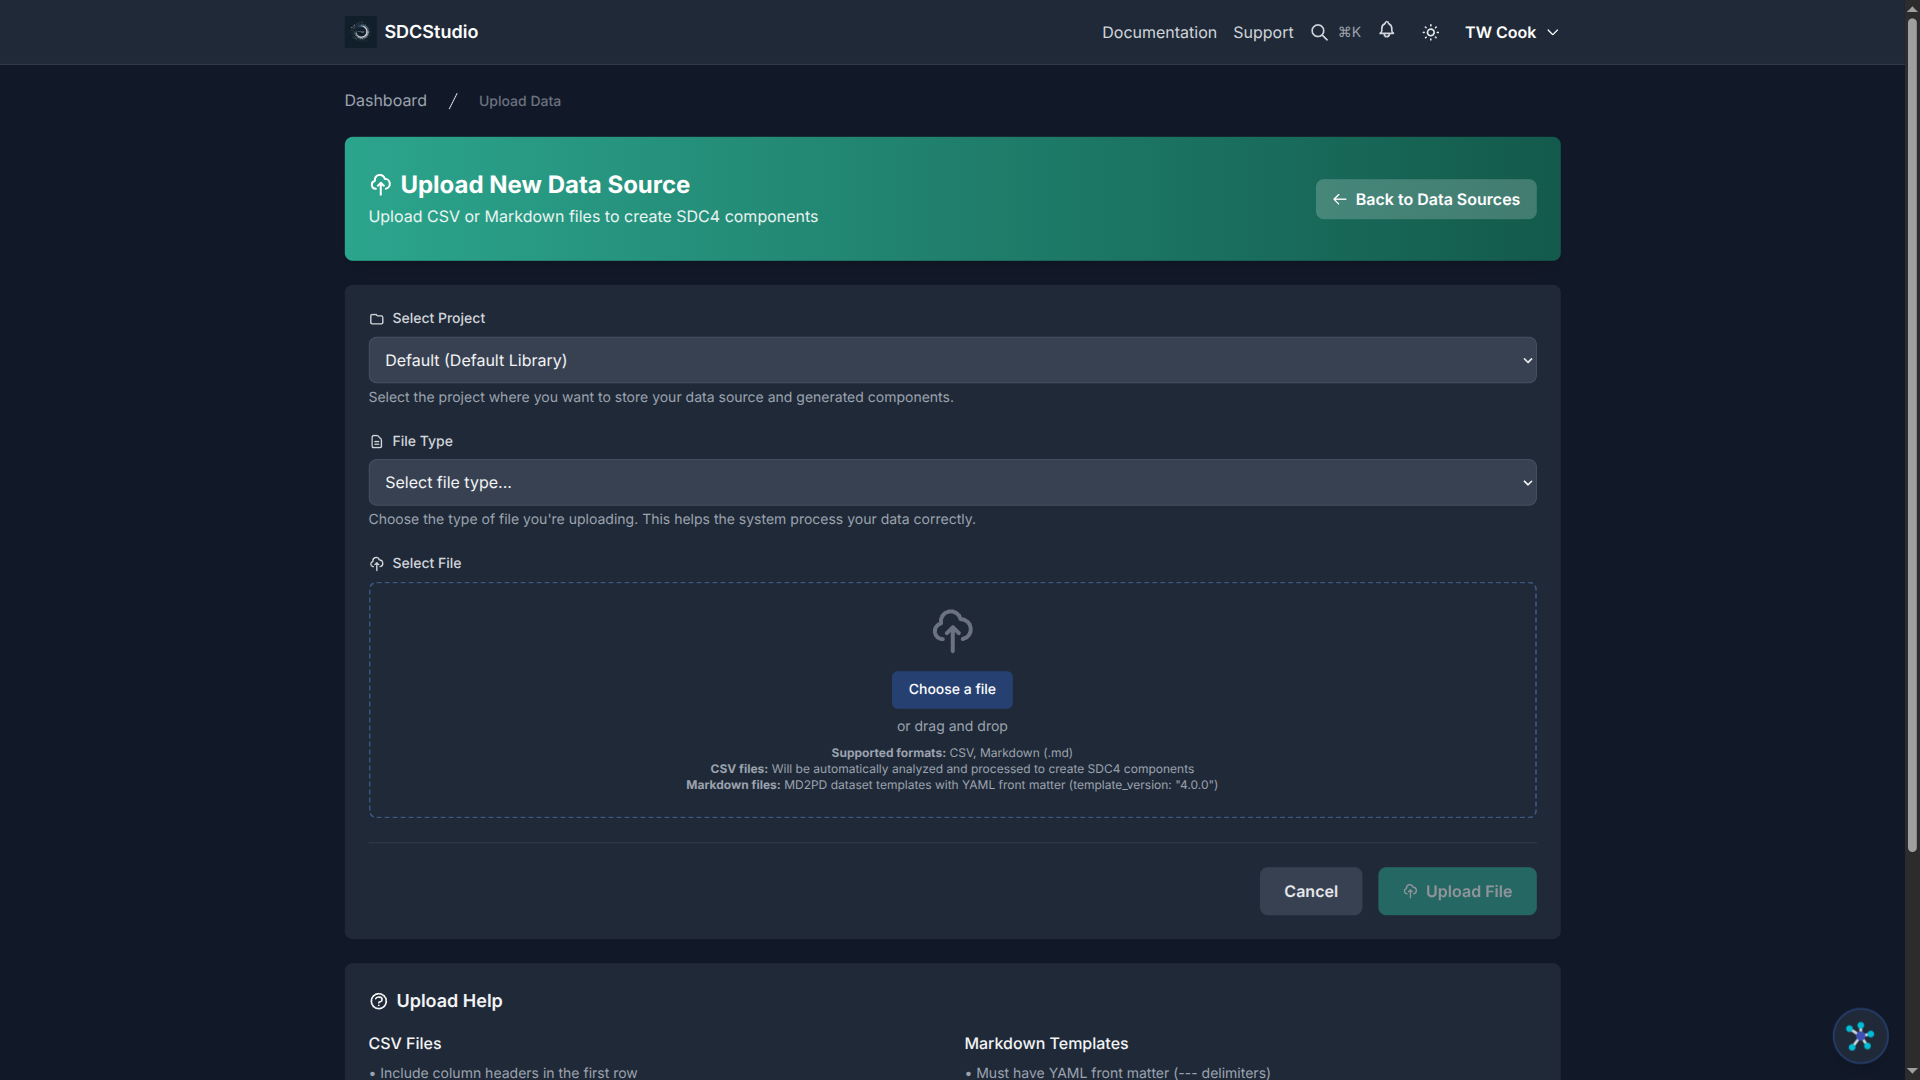
- Open your project
- Go to the Data Sources tab
- Click Upload Data
- Select a CSV or Markdown file
- Click Upload
Your file appears in the list with a blue UPLOADING status badge.
Deeper dive: Tutorial 3: Uploading Data and AI Processing
Step 4: Watch AI Processing
SDCStudio processes your file in two stages:
Stage 1 — Structural Parsing (30 seconds to 2 minutes):
UPLOADED → PARSING → PARSED
The system reads the file, identifies columns, and infers basic data types. No AI/LLM calls happen here — this is fast, deterministic parsing.
Stage 2 — AI Enhancement (1 to 5 minutes):
PARSED → AGENT_PROCESSING → COMPLETED
AI agents analyze each column for semantic meaning, detect patterns (email, phone, date formats), suggest validation rules, and create SDC4 components with appropriate types.
The key benefit of the two-stage design: if the AI stage fails, you can retry without re-parsing the file.
Deeper dive: Tutorial 3: Uploading Data and AI Processing
Step 5: Review the Generated Model
Once the status shows COMPLETED:
- Navigate to the Data Models tab in your project
- Click your model (named after your uploaded file)
- Explore the structure:
- Data Model — top-level container
- Cluster — logical grouping of all fields
- Components — individual data elements
For a CSV with columns customer_id, name, email, signup_date, status, the AI creates:
Data Model: customers
└── Cluster: customers_cluster
    ├── customer_id  (XdCount — non-negative integer)
    ├── name         (XdString — text)
    ├── email        (XdString — with email pattern validation)
    ├── signup_date  (XdTemporal — ISO 8601 date)
    └── status       (XdString — enumeration: active/inactive)
Each component includes a label, description, data type, and validation rules that the AI inferred from your data.
Deeper dive: Tutorial 4: Understanding Components and Data Types
Step 6: Edit a Component
You can refine any component the AI created:
- Navigate to Components or click a component in the model view
- Click the Edit button (only visible for unpublished components)
- The stepped edit form opens with 5 steps:
- Basic Info — label, description, language
- Type Config — type-specific settings (regex, range, enumerations)
- Advanced Settings — sequence number, UI type, validation flags
- Semantic Linking — RDF predicate-object pairs
- Review & Save — summary with Save and Save & Publish buttons
In edit mode, you can navigate freely between steps — click any step in the stepper to jump to it.
Deeper dive: Tutorial 6: Editing Components
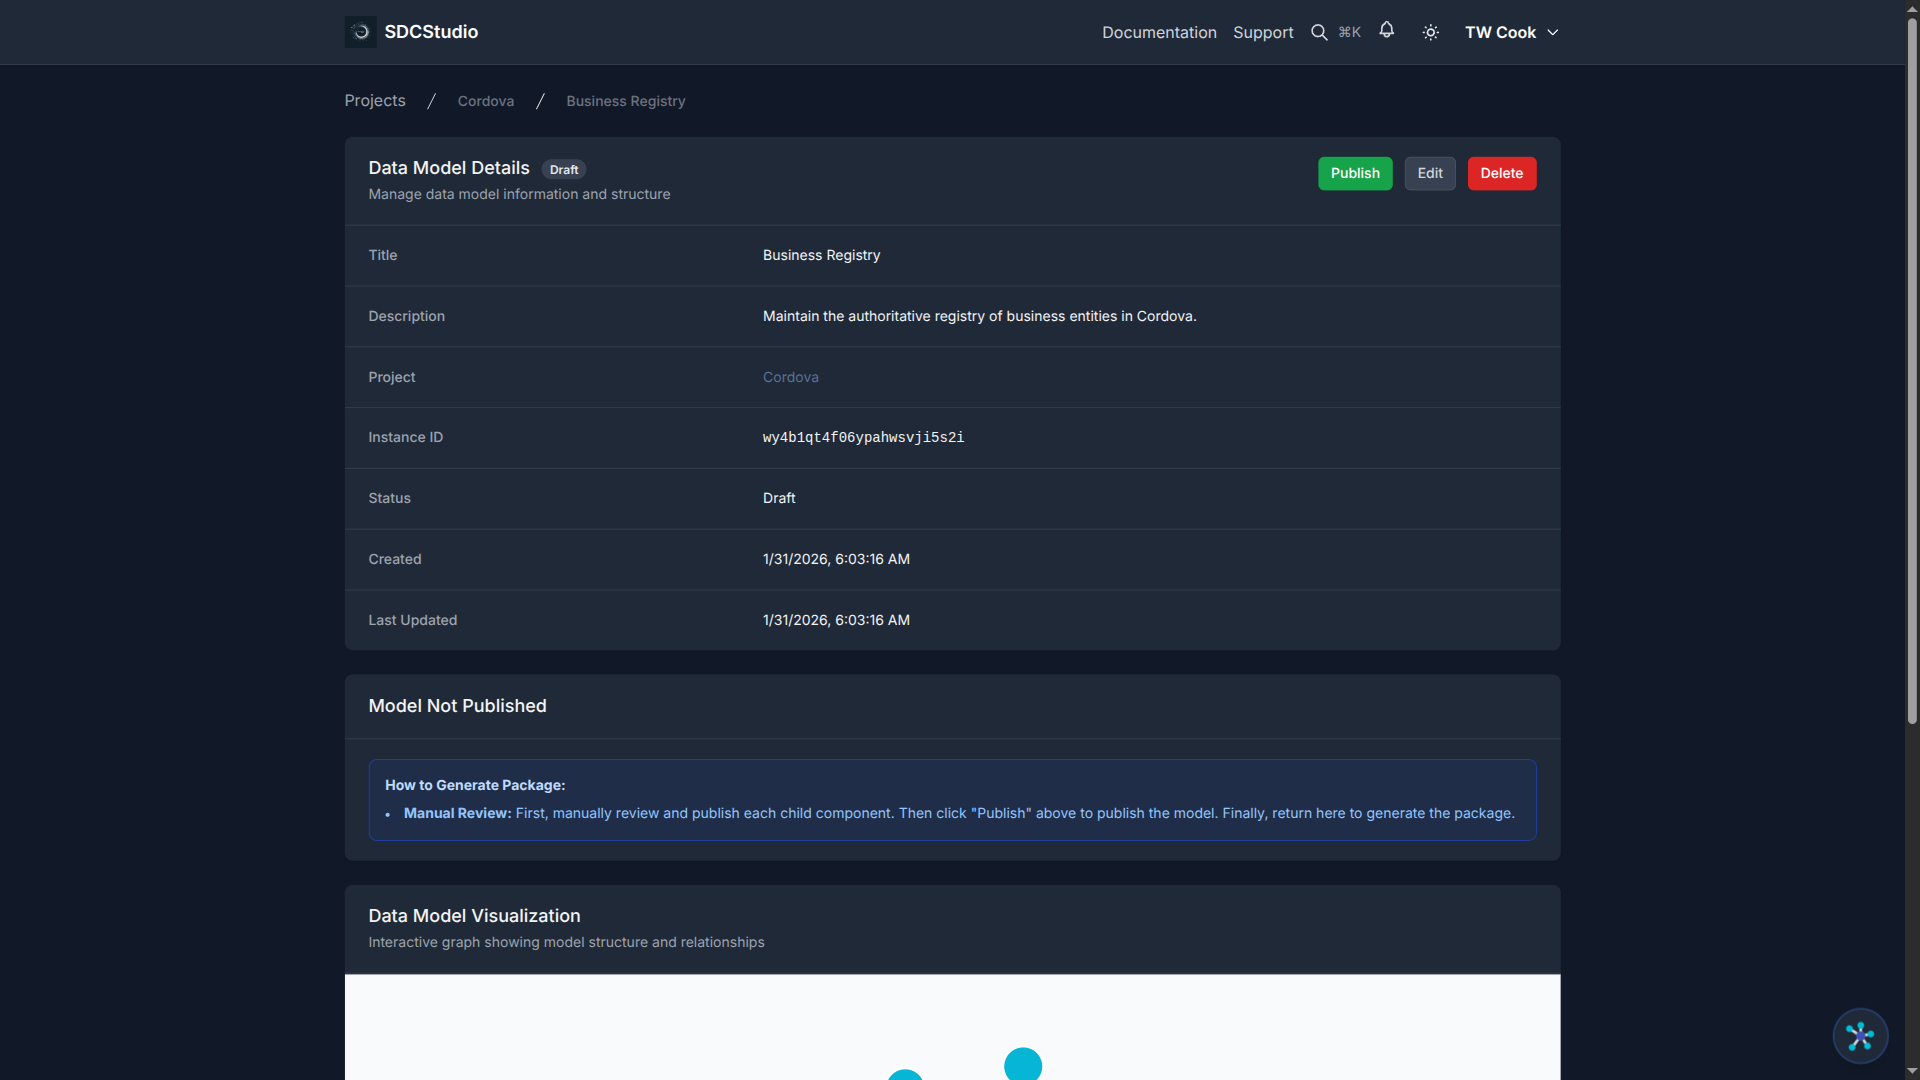
Step 7: Publish the Model
Publishing is a one-time, irreversible operation that locks the model and enables output generation.
Publication order matters: 1. Publish all child components first (Save & Publish on each) 2. Publish the data model 3. Generate the package (also one-time only)
After publication, the model and its components cannot be edited. If you need changes, create a new version.
Deeper dive: Tutorial 9: Publishing and Generating Outputs
Step 8: Download Outputs
After generating the package, download individual files or the complete ZIP:
| File | Purpose |
|---|---|
dm-{id}.xsd |
XML Schema for validation |
dm-{id}.xml |
XML instance with sample data |
dm-{id}-instance.json |
JSON instance data |
dm-{id}.jsonld |
JSON-LD semantic schema |
dm-{id}.html |
Human-readable documentation |
dm-{id}.rdf |
Extracted RDF triples |
dm-{id}.ttl |
SHACL constraint shapes |
dm-{id}.gql |
GQL CREATE statements |
{title}.zip |
Complete package |
Deeper dive: Tutorial 9: Publishing and Generating Outputs
Key Concepts
Projects
Projects are top-level containers that organize related work. A project can hold multiple data models, each with its own components and clusters. Use projects to group models by domain, department, or initiative.
Data Models
A data model is the top-level SDC4 structure. It has a name, description, and status (Draft or Published). A model contains a Data cluster that groups all components, plus optional sections for Subject, Provider, Participation, Workflow, Attestation, Audit, and Links.
Clusters
Clusters group related components into logical units. A "Customer" cluster might contain name, email, and phone components. Clusters are flat — all components are direct children of the cluster.
Components
Components are individual data elements — the building blocks of your model. Each component has: - A type (XdString, XdCount, XdTemporal, etc.) - A label (human-readable name) - A description (purpose and usage) - Validation rules (patterns, ranges, enumerations) - Semantic links (RDF predicate-object pairs to ontology concepts)
Components are the individual building blocks of a data model. They represent individual fields in your data.
Summary
The SDCStudio workflow is:
- Configure Settings and upload ontologies
- Create a project
- Upload a data file
- Watch the two-stage AI pipeline create a model
- Review and refine components
- Publish (irreversible) — children first, then model
- Generate the package (one-time)
- Download outputs in multiple formats
At each step, you control the process. The AI gives you a strong starting point; you refine it to match your exact requirements.
Next Tutorial
Uploading Data and AI Processing — Learn the details of file upload, supported formats, and what happens during each stage of AI processing.